This section is about the software FORScan and a step-by-step guide to how to operate and expand the functionality. This page is continuously expanded.
This page is continuously expanded and supplemented depending on how I have time.
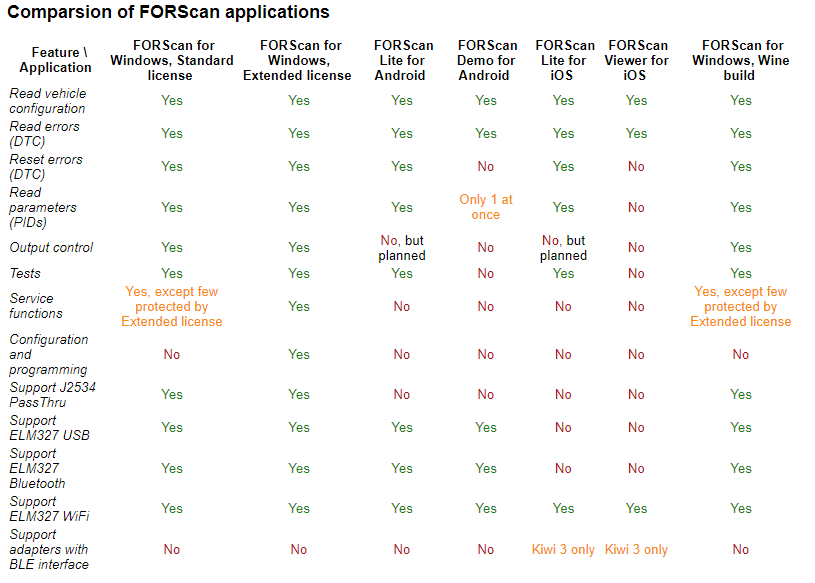
The list below shows an overview of which version is possible with which version (as of February 2019). As you can see, only the PC version offers the possibility of configuration & programming, and we dedicate this to each other.
Software
Download the software here–> FORScan
So if you want to program, you need a license. This can be applied for free for 2 months to test the program. Then select a license that is desired depending on the duration.
How to apply for the (free) license is described in detail in the forum. Here’s the link if you missed that with the licenses: https://forscan.org/download.html
Hardware
Inexpensive entry-level hardware (manual switch)

Hardware recommended by FORScan (automatic switch)

The first steps
[su _ spoiler title = “Connect hardware and start software”] Install software and drivers, plug in USB OBD (left under the steering wheel, above the hawk to open the bonnet). Putting switches on HS (with me, that’s towards the middle of the adapter. Outpointing to the outside world, he stands on MS. Don’t be afraid here, the software tells you when to switch. Then start FORScan. The software now launched includes the default license (column 1 at the top of the picture). So you can do a lot from your house, only programming is not (yet) possible.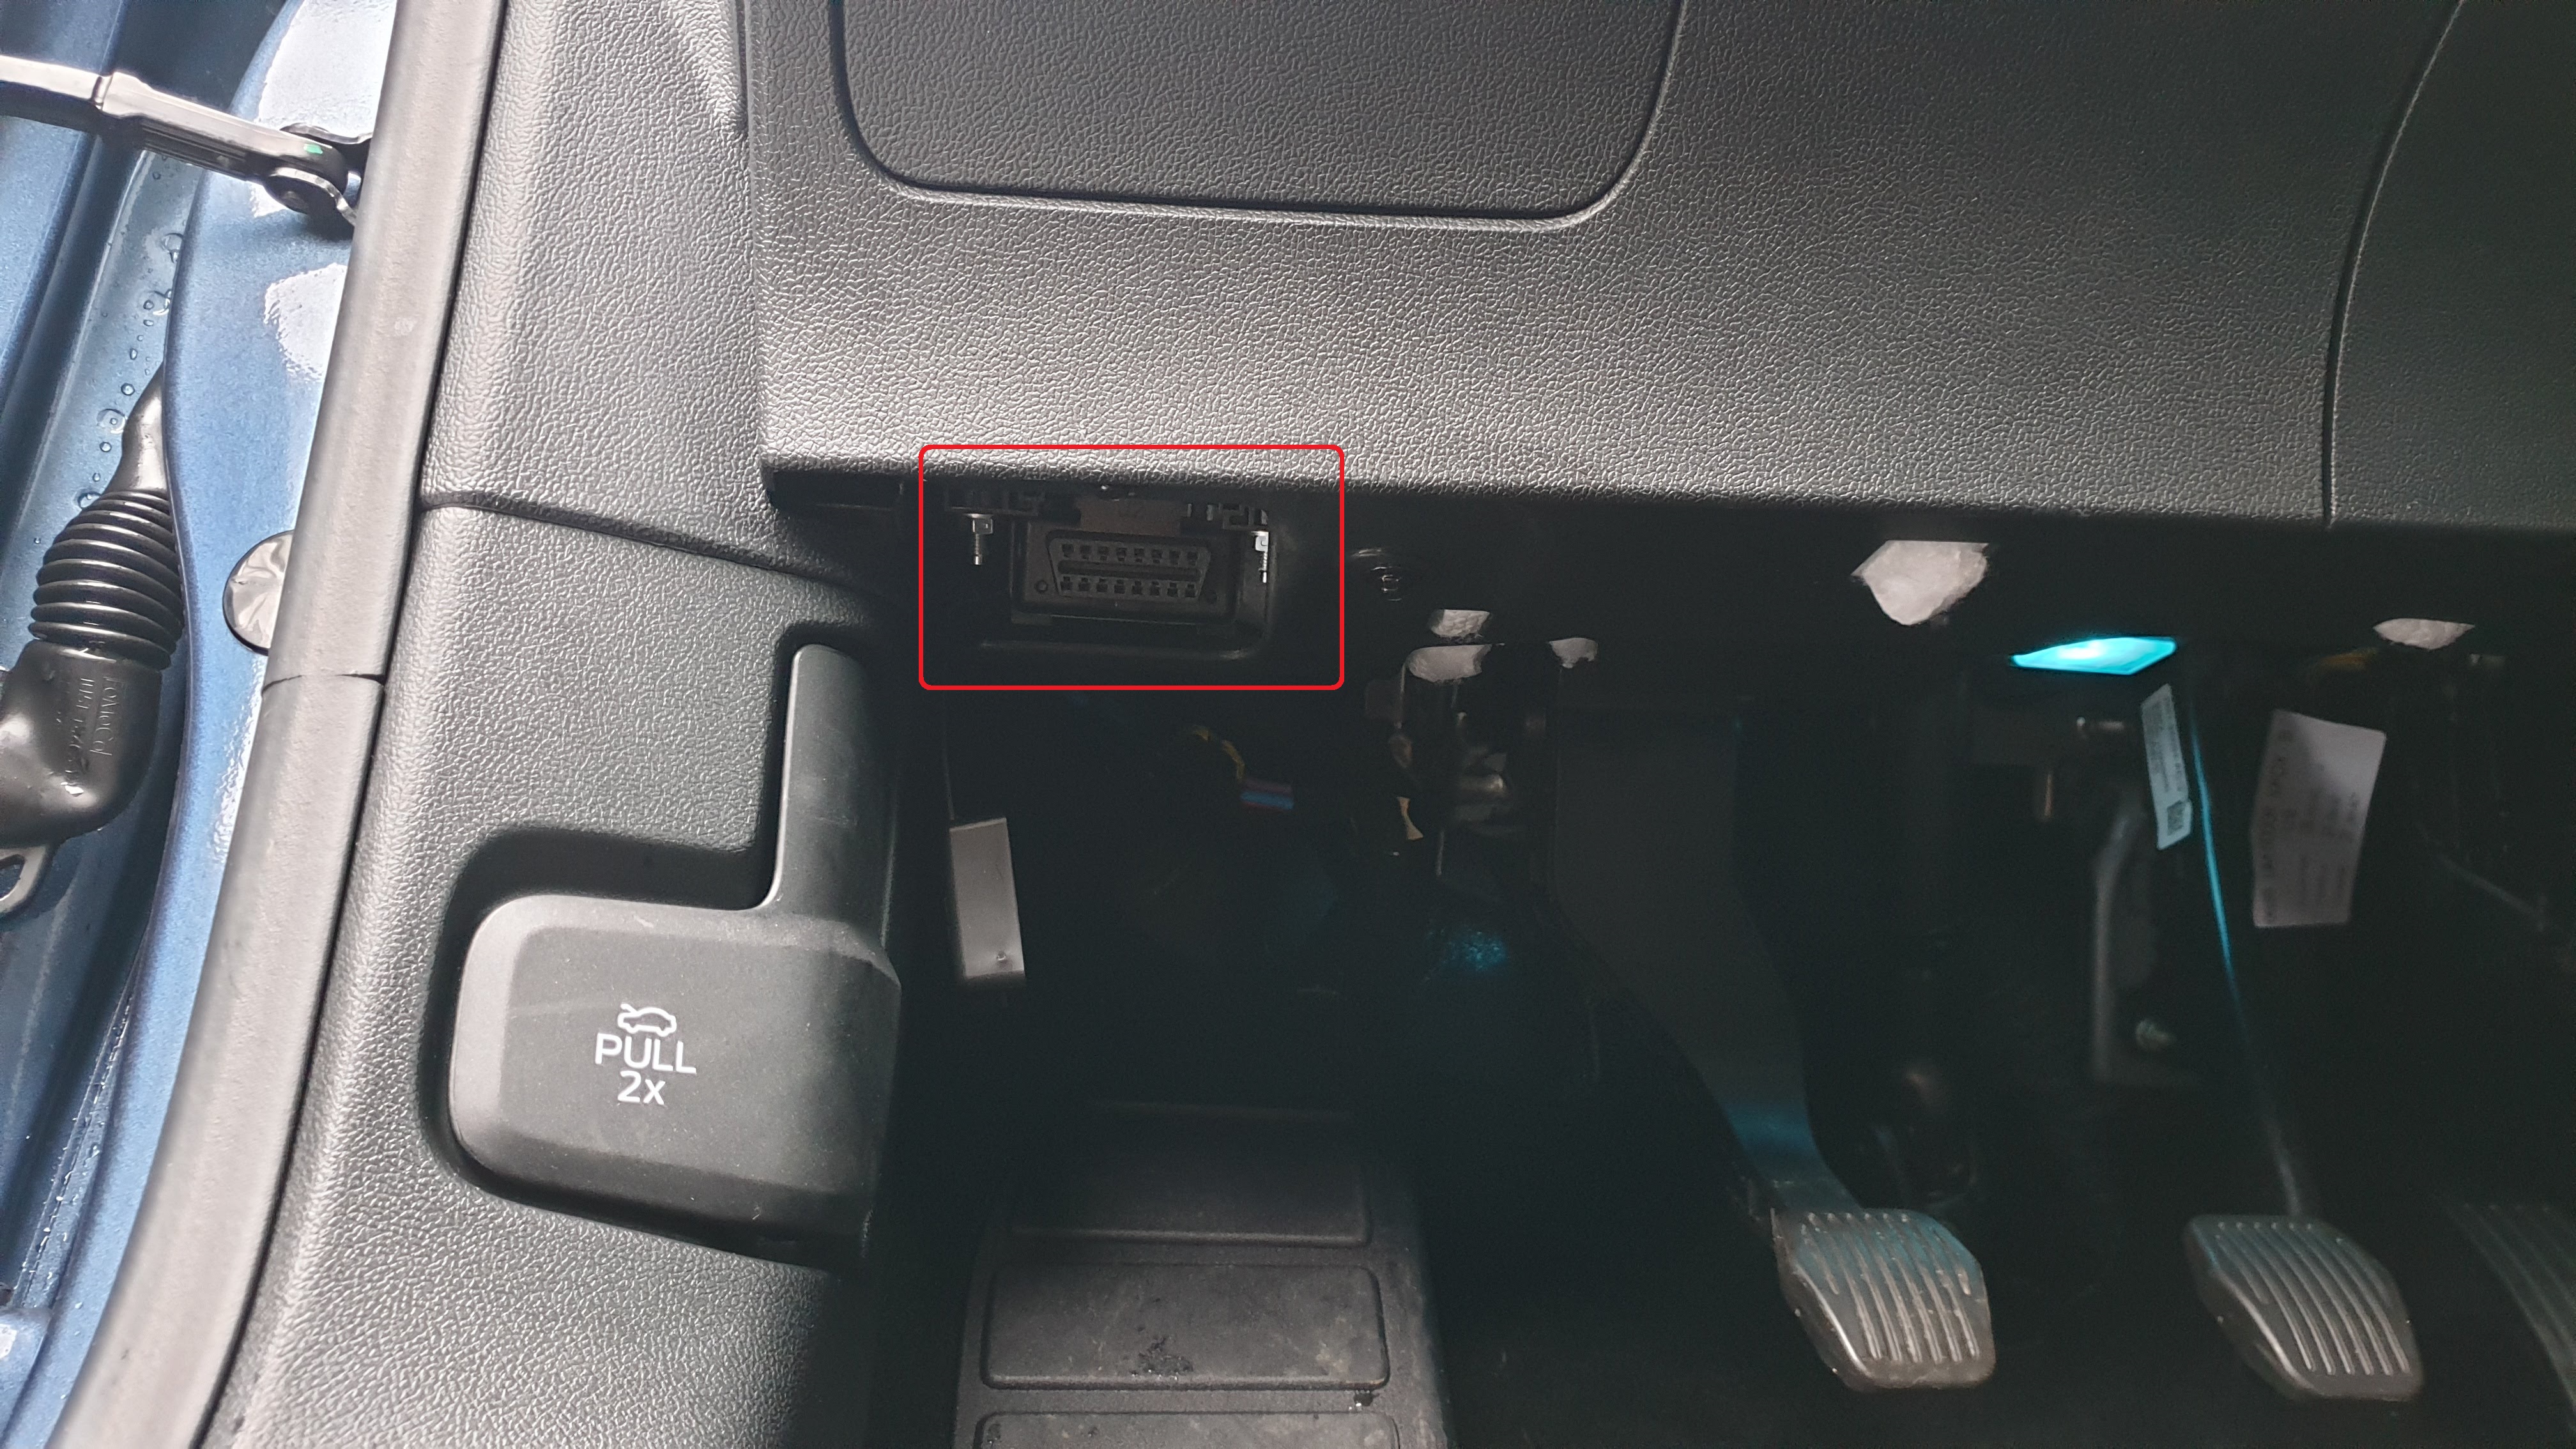
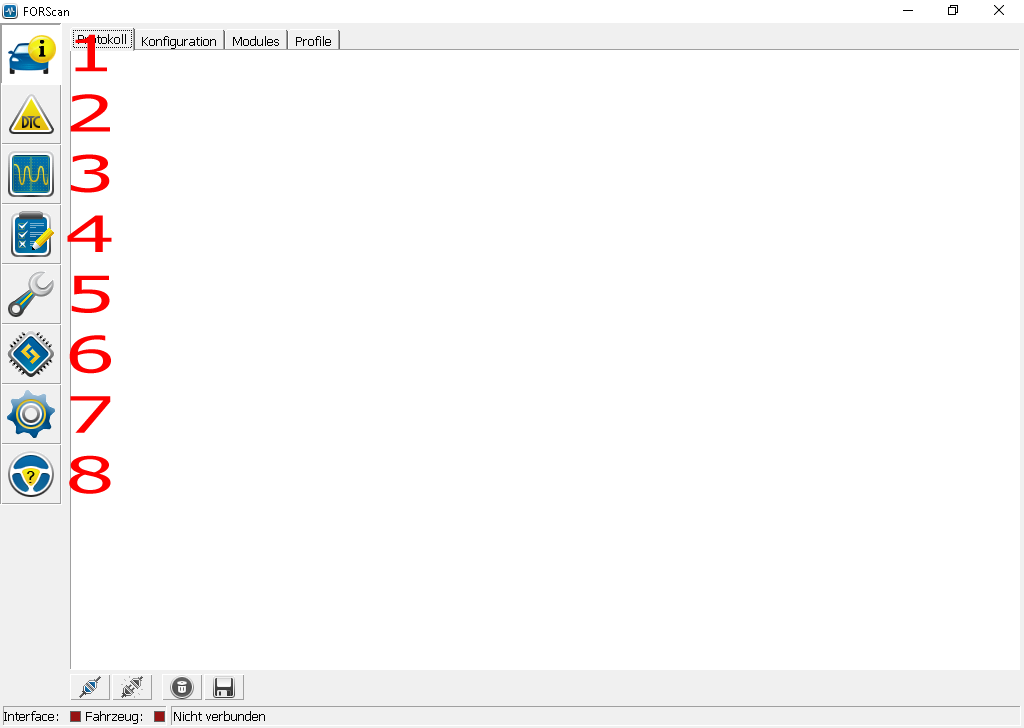
Point 1-Vehicle and interface information
This point has 4 riders, namely protocol, configuration, modules, profiles.
- Protocol displays the current protocol, so which interface attempts to connect, which modules/control units have been found
- Configuration shows in detail the read data, such as Vehicle identification number, names of modules, part numbers and software versions
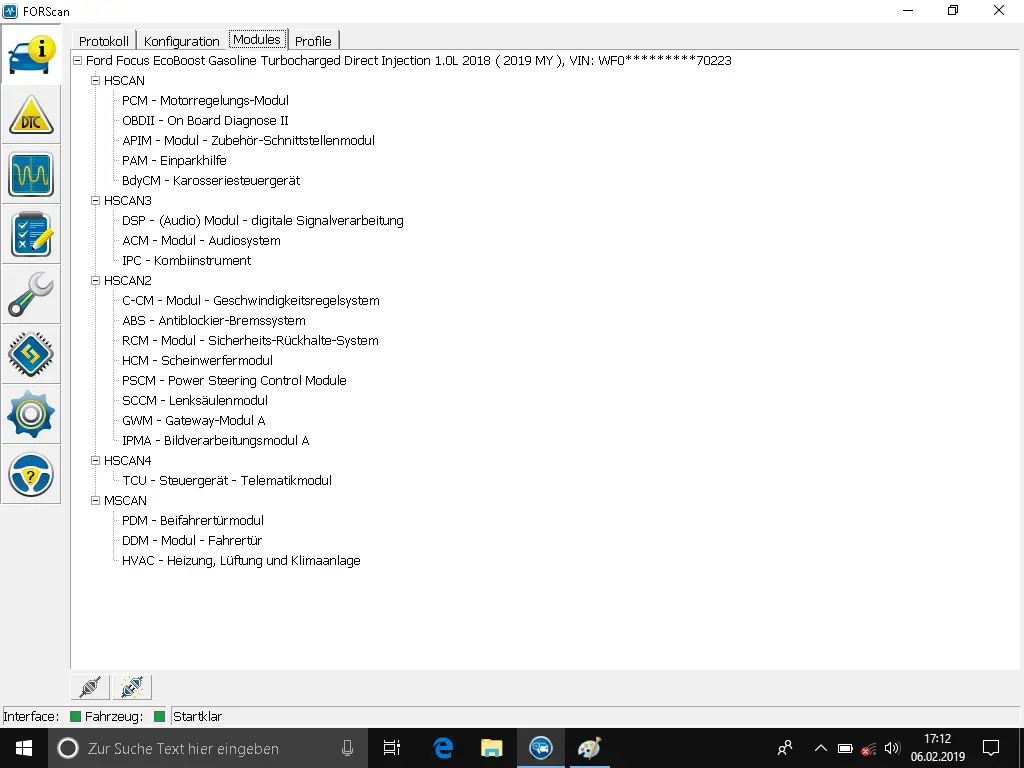
- Modules clearly shows the modules/control units found
- Profile shows the saved profile (after the connection is established, the question of whether you want to save a profile)
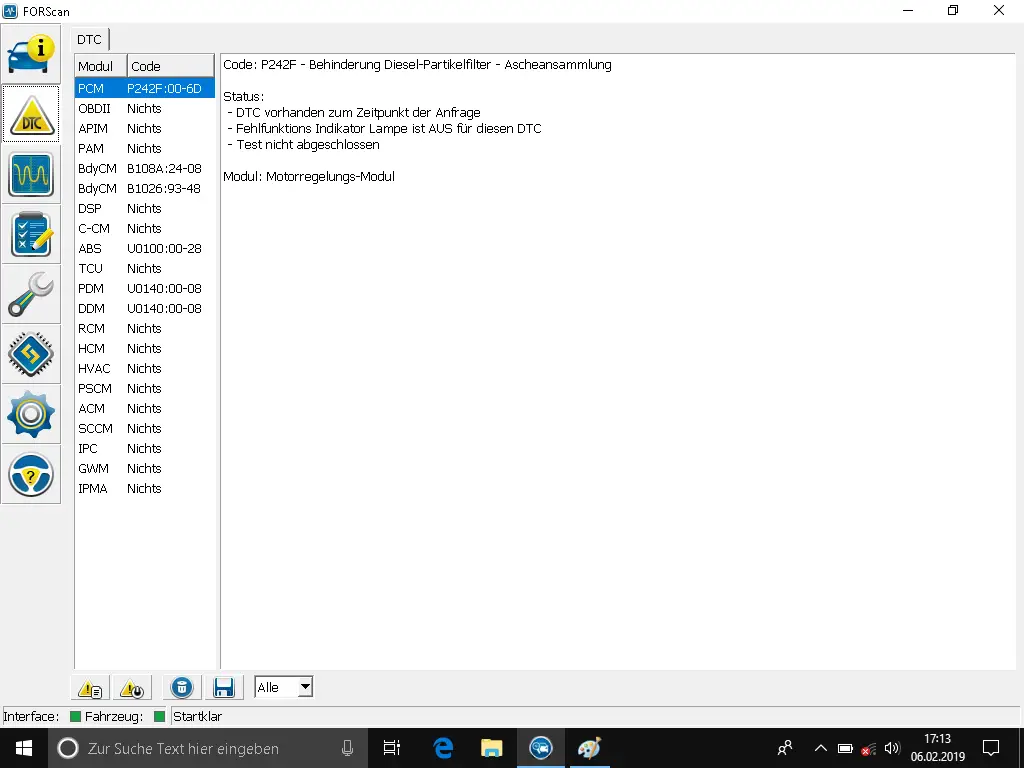
Point 2-Read DTC codes
DTC means Diagnostic Trouble Codes and here you get the saved error code for each module (if any)
Not only the error code as a number, but there is always a description of what it means.
This point can also be used to delete the error codes.
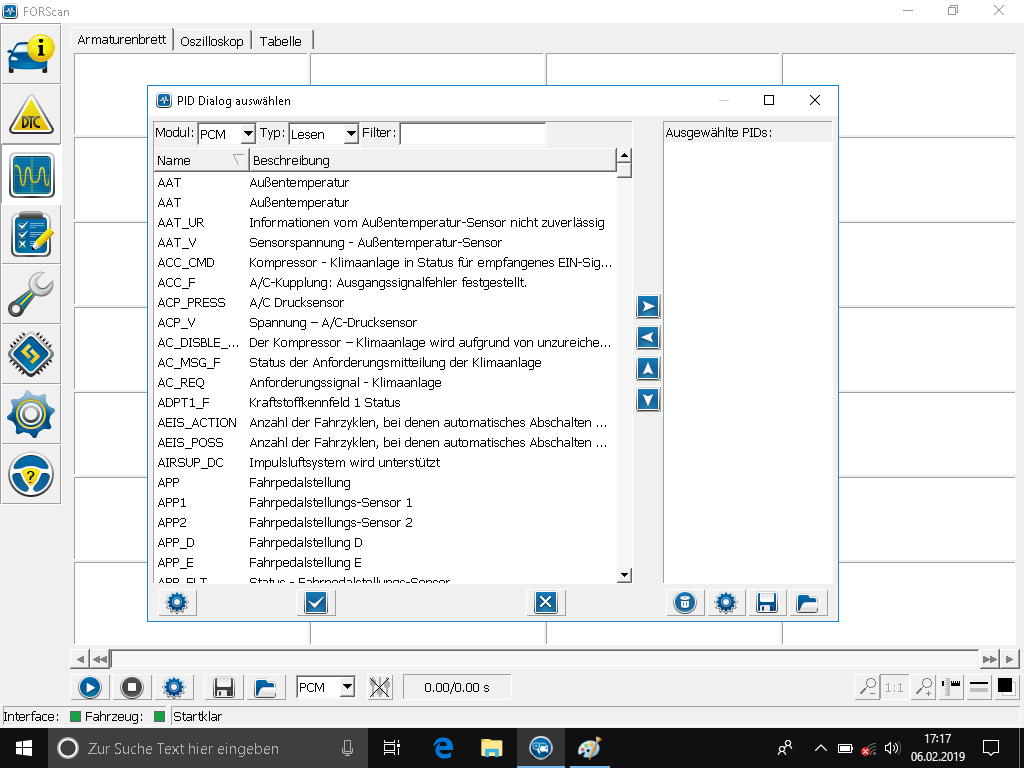
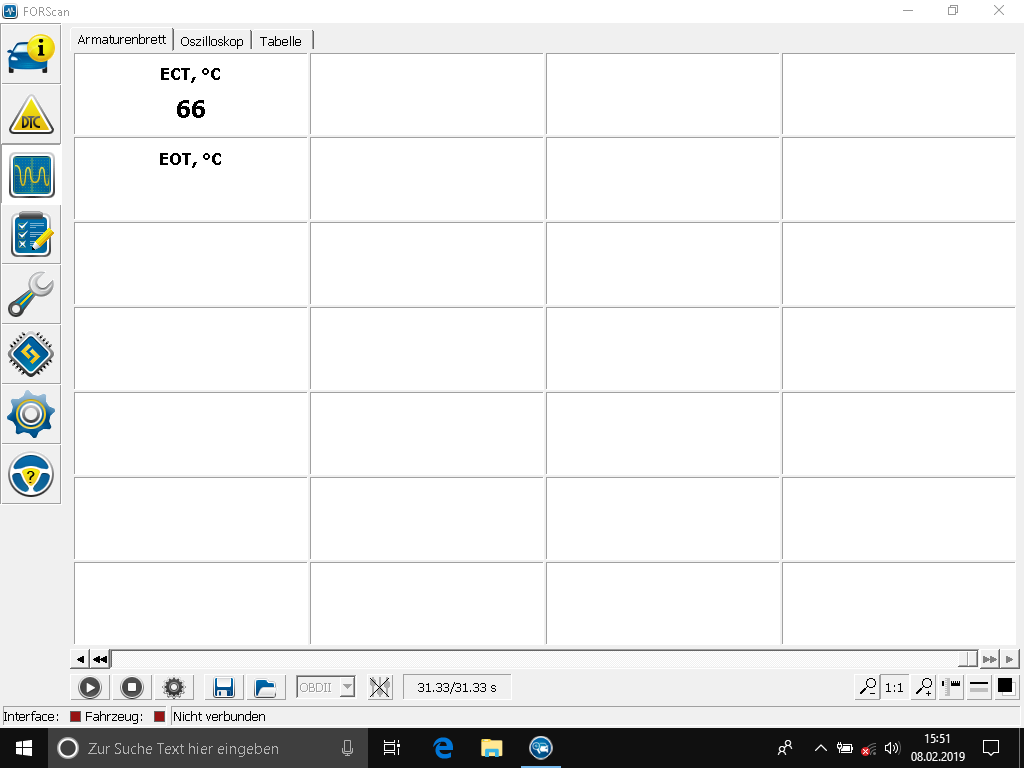
Point 3-Read PID Data
Here you can read out various values of the modules and follow them live. As a simple example, you can read the battery voltage permanently. With the standard license for PC, you have access to various parameters that you can read out. In the demo version of the Android app, only one read out of a parameter is possible at a time, in the paid version several can be read out in parallel
This is very useful if an error appears while drivi
ng/sporadically.
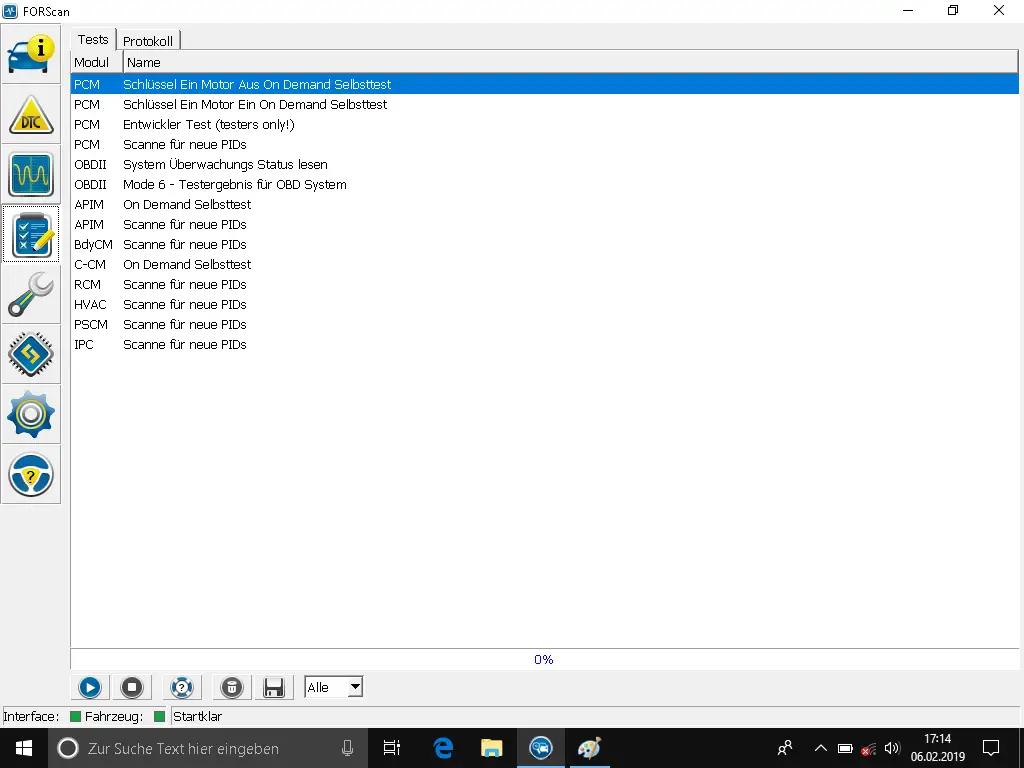
Point 4-Vehicle Tests
This point includes 2 riders, tests and protocol
- Tests show the possible tests that can be carried out
- Protocol shows the results during the tests
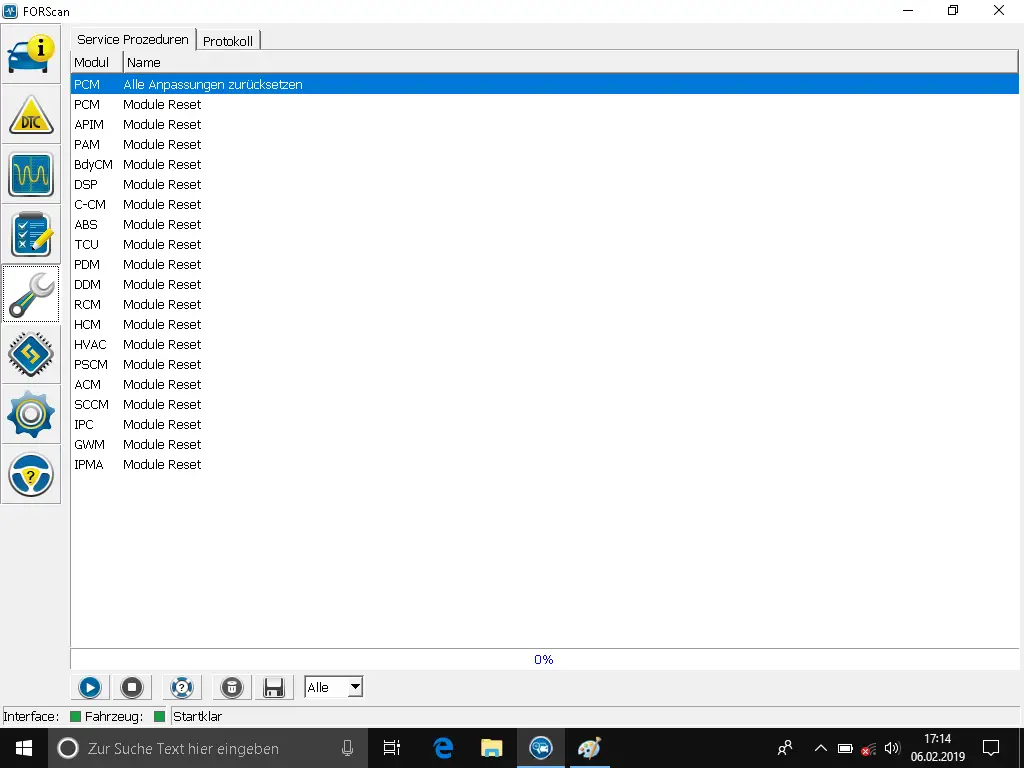
Point 5-Service Features
This also includes 2 riders, service procedures and protocol
- Service procedures displays the supported service procedures such as PATS Programming (PassiveAntiTheftSystem)
- Protocol shows results during service procedures
Point 6-configuration and programming
Also, this point includes two riders, configuration and programming and protocol
- Configuration and programming gives the possibility to read individual modules (standard license) and program (extended license)
- Protocol shows the results/current status of programming
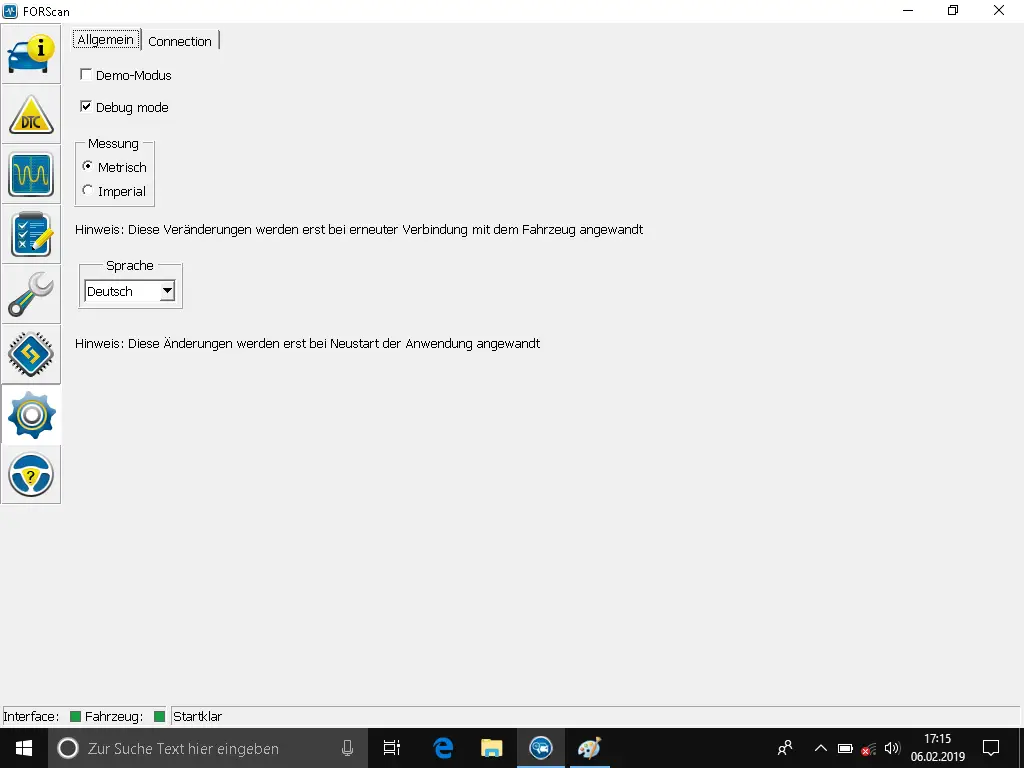
Point 7-Settings
This point has 2 tabs, namely general and connection
- In general, the language can be set as well as the unit in which the display is to take place. In addition, Debug mode is active by default. This logging of everything and can be sent to the developer for error diagnosis if necessary. In demo mode, something can also be “played” without a dongle being connected, a vehicle is simulated.
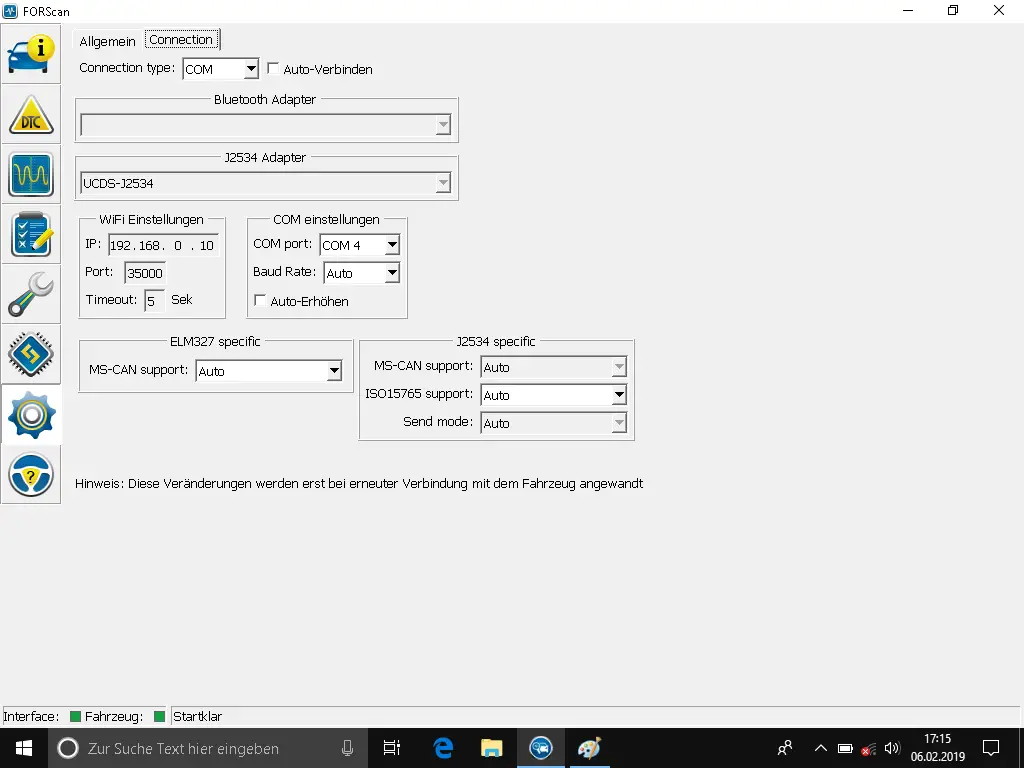
- In connection, the connection can be set. By default, everything is set to car, which is perfectly sufficient. When connecting, you try to go through all possible connectivity options in order to establish a connection
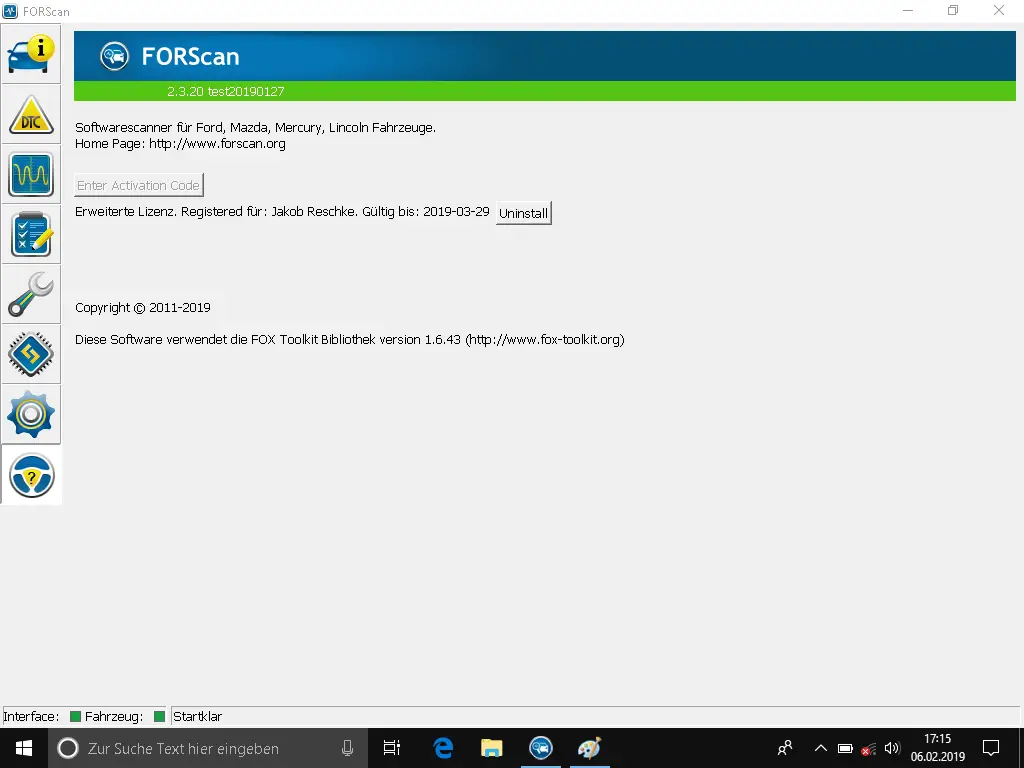
Point 8-About
Here, the program shows you the version you have installed, general information, and the license you’re using.
[/su_spoiler]
Detailed explanation
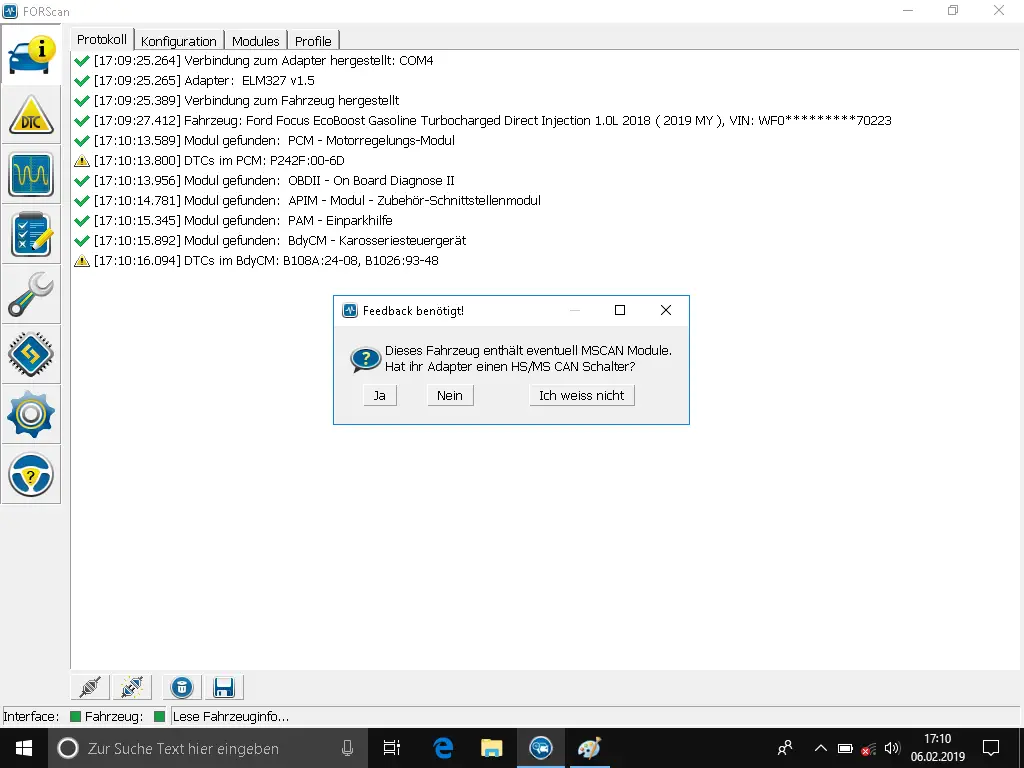
[su _ spoiler title = “The connection set-up”]At the first start, FORScan asks for the existing SYNC version, select SYNC 3 here.

After that, FORScan leaved out the vehicle data and searches for control device/modules. You will be asked if your adapter has an HS/MS switch, answer yes here. Then comes a hint to put this on MS (switch points outwards) and confirm with OK.
More control device/modules are displayed. Last but not least, the configuration found will be saved, you can keep the suggested name or choose another one.
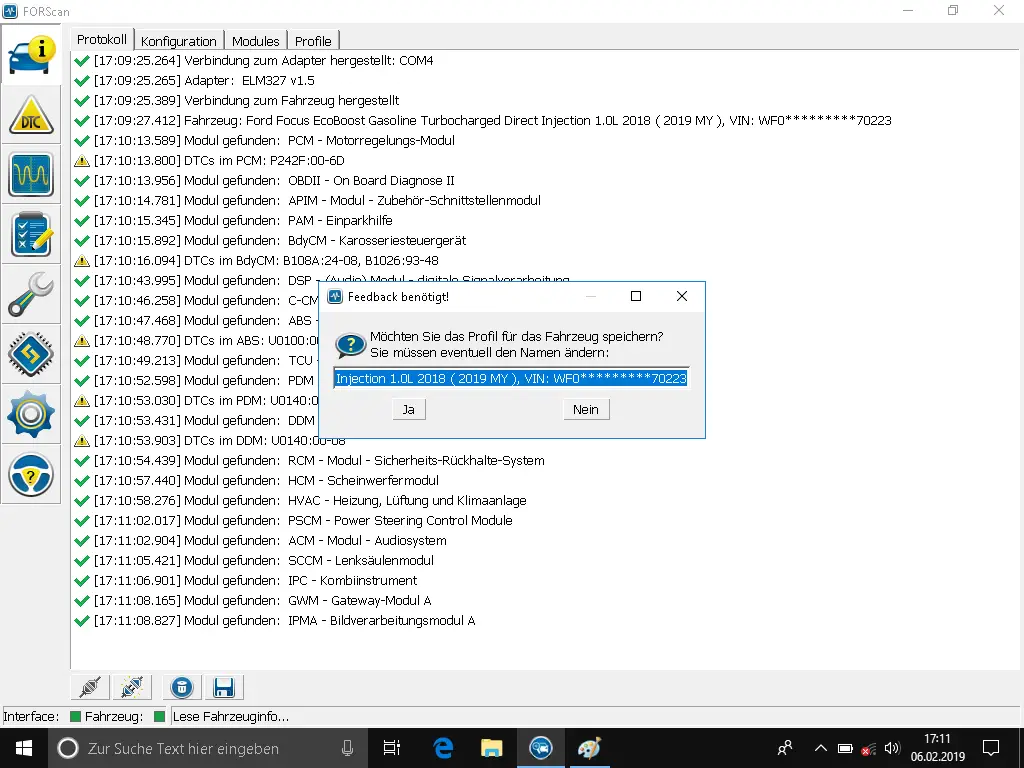
The next start you ask if you want to load this configuration, then the start shortens a bit.
Your screen should now look something like this.
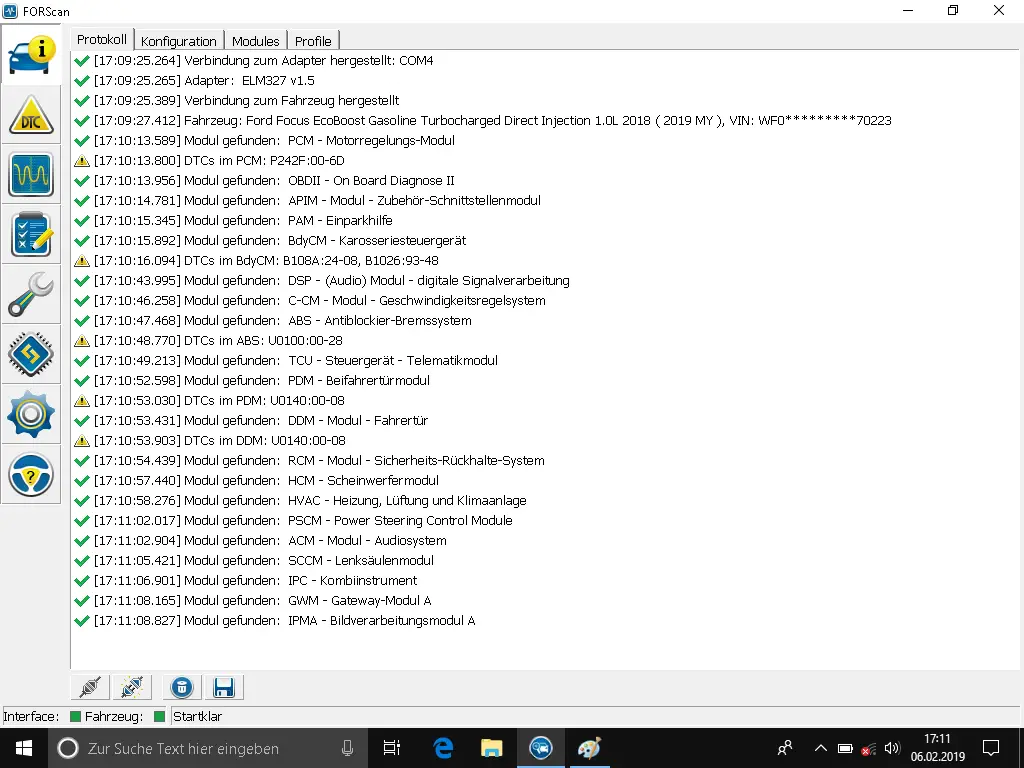
The Rider configuration shows you in detail all the components found, including. Part number, serial number, mileage, vehicle number, …
The Module rider shows an overview of the modules found and which bus you hang on to (high-speed or medium-speed).
The Rider Profile shows the saved profiles. This is actually only useful if you reconfigure multiple cars more often.

The DTC rider is used to read out error codes stored in memory. These are used for diagnosis if the vehicle has a fault/behaves comically. Will, for example, A defective part is replaced (e.g. A sensor) makes it essential to delete the memory. This can be done by the switch at the bottom of the screen.
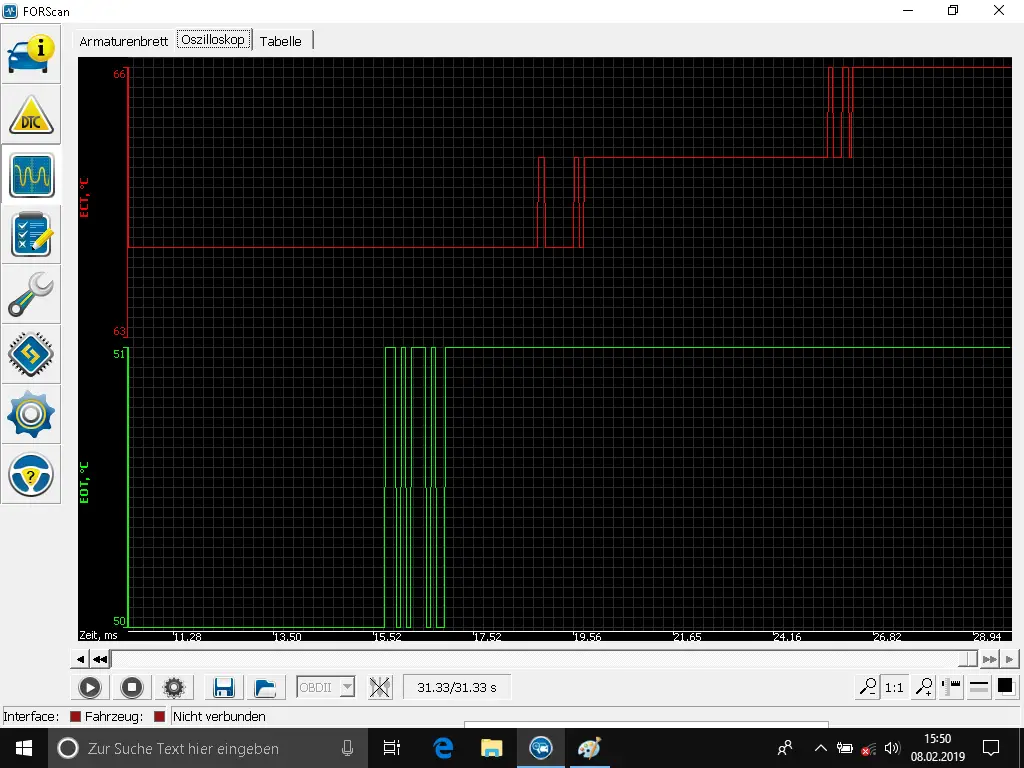
Using PID to read out data, you can read out various sensors of the vehicle. This looks chic depending on the configuration, but can also help with the error diagnosis.
Various vehicle tests can be carried out here. This list (as well as all others) is constantly evolving, which is why other tests can be listed here depending on the version level.
Currently not much possible except that you can reset the modules.
This point is the one that needs the most explanation. This gives him his own page. Link is also at the bottom of the page, so you can read on as normal.

Here you can set the language, the units as well as whether the demo mode should be used. This simulates a car and some functions can be tried out like this.
Under connections, you can set different settings for different adapters. It’s a good idea to leave everything as it is, unless you know exactly what you’re doing.
Here you can see the installed version you are currently using. On top of that, you’ll see the license. The standard license will show you a device code. With this device code, you can create the code for the Advanced License on the FORScan page. As of today, the code is valid for 3 months. After that, you can apply for it again. What is after that will be the time.
The license is tied to the laptop by the device code. So you can’t use the license again on another laptop.