Here we go to the impotted, namely the programming of the individual modules. This guide serves as an entry point. Not all parameters are known so far and thus this guide is constantly expanded and supplemented with information as soon as I have more. The same applies to the FORScan software as soon as it is known what parameter changes this will be incorporated into the next release.
If you need an overview/introduction, check out this page here.
Let’s start with the overview:
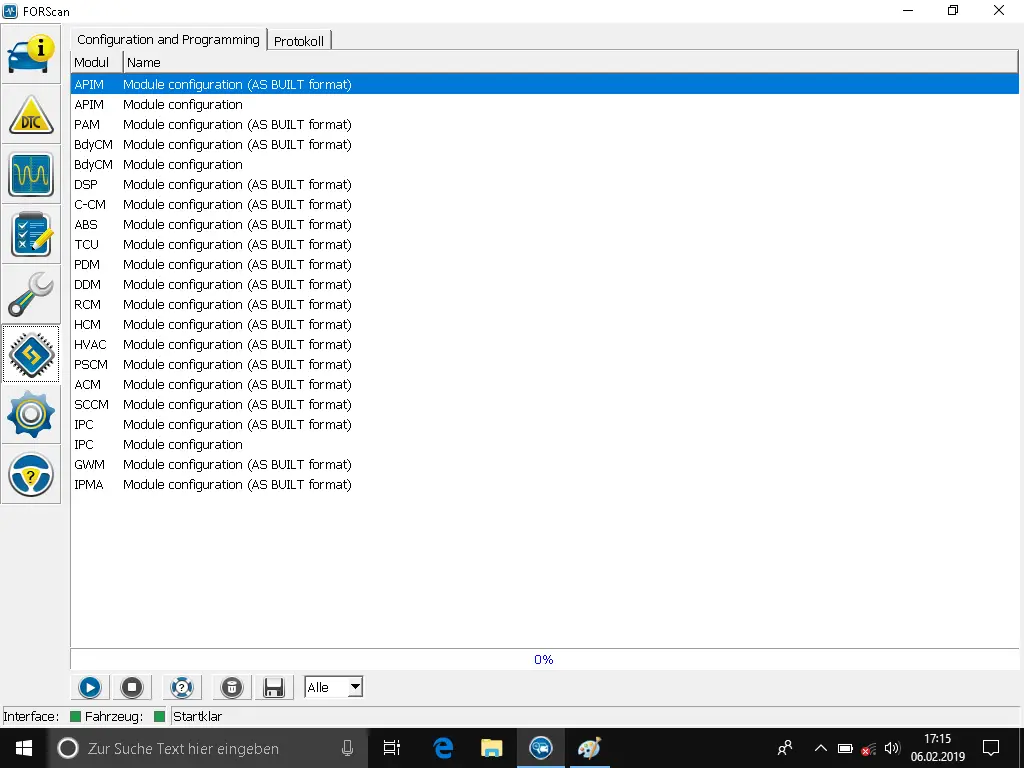
Here we see the found modules in the first step.
Modules and their meaning
ABS (Anti-Lock Brake Modules-(brakes) Anti-lock Scheme)
ACM (Audio Control Unit)
APIM (Accessory Protocol Interface Module)
BdyCM (Body Control Module-Body Control Refrigerator)
C-CM (Cruise Control Module)
DDM (Driver Front Door Module-Driver’s Door Module)
DSP (Digital Sound Processing Module)-only at B & O
OBD II (On Board Diagnosis II)
GWM (Gateway Module A-Distribution Module A)
HCM (Headlamp Control Module)
HVAC (heating, ventilation and air conditioning-heating, ventilation, climate automatic)
IPC (Instrument Panel Control Module-dashboard/instrument cluster)
IPMA (Image Processing Module A-Image Processing Module A)
PAM (Parking Aid Module)
PCM (Power Control Module-engine control module)
PDM (Passanger Door Module-passenger door module)
PSCM (Power Steering Control Module)
SCCM (Steering Column Control Module)
SODR (page obstacle recognition-right)
SODL (page obstacle recognition-left)
RCM (Restraint Control Module)
TCM (Transmission Control Module)
TCU (Telematic Control Unit)
TRM (pendant module)
WACM (charging module-wireless accessories)
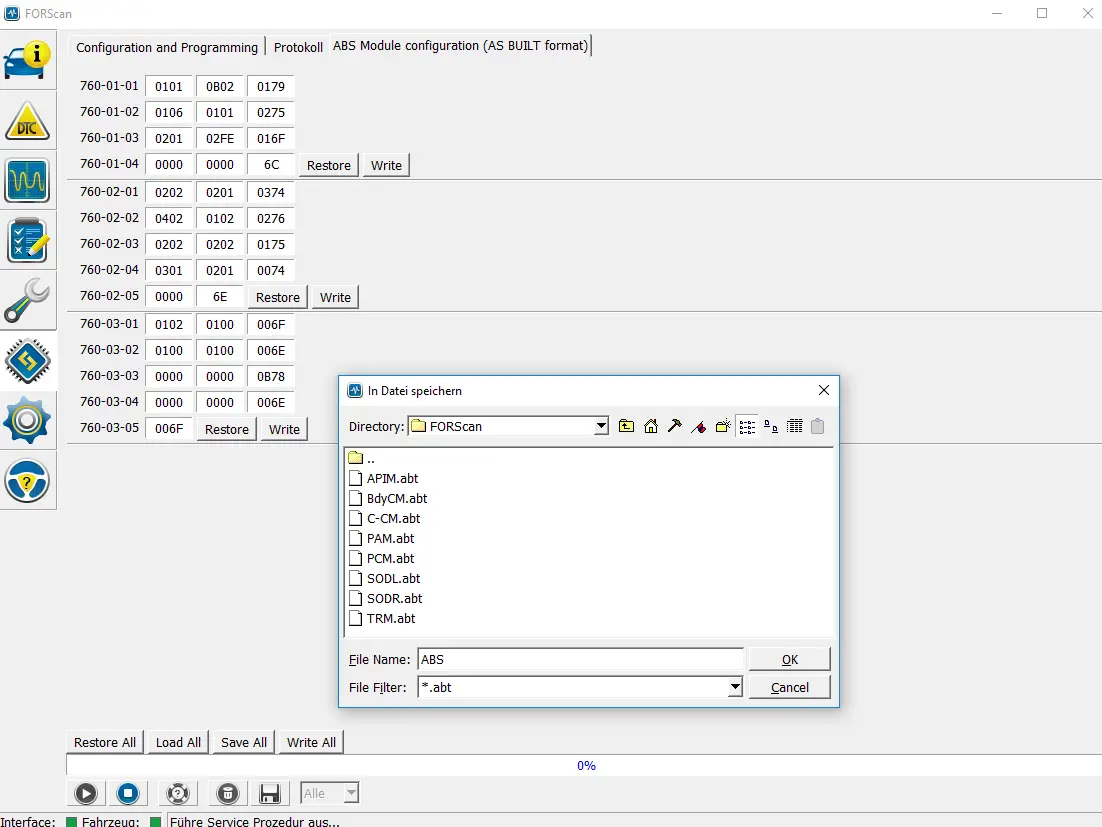
Saving the current/standard configuration
This is an important step before any changes are made. Please save the configuration from each module / make a backup of all modules.
This is done by pressing on a module at the back with the addition AS BUILT and then starting at the bottom of the “Play” button that reads out. Once the module has been read out, you can click on “Save All” and save the configuration. It is best to create a new folder and select and save a suitable name. I take the name of the module on this.
Loading the standard configuration
If you have carried out the step above, it is then easy to load the configuration. Namely via the “Load All” button you can select the saved file and all parameters are loaded. With “Write All” all parameters are then written to the module.
Configuration
On closer inspection, it is noticeable that some modules appear twice.
Module configuration (AS BUILT format)-For advanced
Here very much to her the individual deposited values in the modules. It’s a science in itself. Each model has different values, so it is not (always) possible values of e.g. Transfer an F150 to the Focus and there are also differences from model year to model year. If you still want to experiment or find lists you want to try, it works like this:
Example to change the start animation for a Ford Explorer: Whether this also works for the Ford Focus MK4 is not confirmed and therefore it has to be tried (at your own risk!!!)

If you are now keen to experiment and would like to try this out, the following applies:
APIM = Denotes the module that needs to be changed. Click on the module here and press the play button. Data is read out.
7D0-02-01 = Address where the change must take place
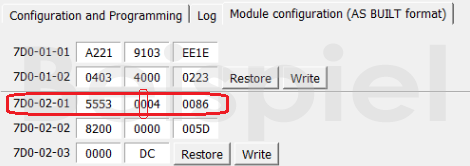
The x ‘ s need to ignore are important letters and numbers, which show two pieces of information. First, the position where the change should be made and on what value to change. So if we want a Mustang animation, we would have to enter the number “6” at the 6th position, i.e. a 0 a 6.
zz = check sum, is formed on the basis of the registered values to check whether everything is right. Don’t worry about it, FORScan automatically calculates this sum and corrects it in the background! There is still a hint when you change an entry and press Write that the checksum is not correct. Simply confirm this note with OK.
Module configuration-For beginners
This is the most convenient, easiest and, above all, safest way to change data and thus program the module. I recommend everyone to make changes only about this, as long as they have not incorporated into the matter.
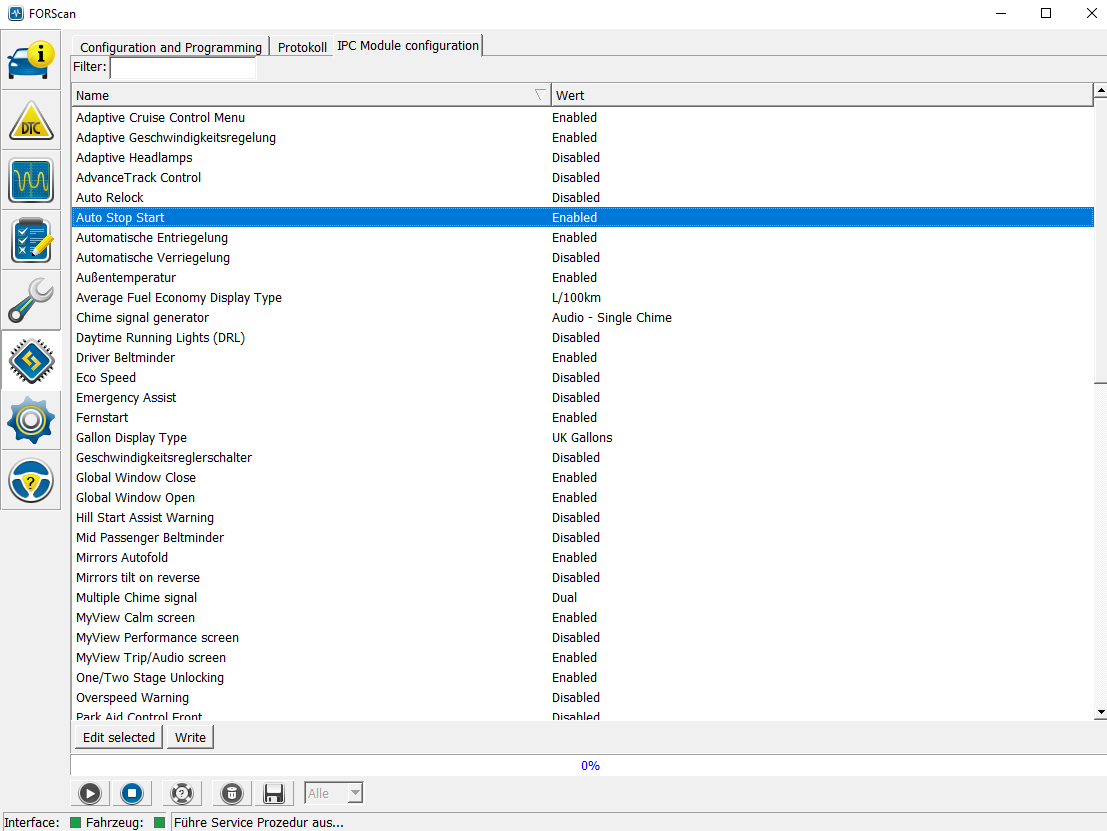
I put it in English and sometimes in German, so don’t be surprised that some screenshots are English/German.